Playwright Cheat Sheet
Written byDominik SzahidewiczReviewed byPaweł Bylina


Updated: September 30, 2026View as Markdown
Playwright is a cross-browser end-to-end testing framework for Chromium, Firefox, and WebKit. Create a project with npm init playwright@latest, run it with npx playwright test, and use locator-based actions with web-first assertions. The syntax table below is verified against Playwright 1.62.
🤖 Summarize this article with AI:
💬 ChatGPT 🔍 Perplexity 💥 Claude 🐦 Grok 🔮 Google AI Mode
Playwright is an open-source automation library for web testing and automation. It allows developers to write scripts that can control a web browser and perform actions just like a human would, such as clicking on elements, typing text, navigating through pages, and capturing screenshots.
Playwright supports multiple browsers, including Chrome, Firefox, and WebKit, which allows for cross-browser testing. It provides a powerful API to automate web interactions and is capable of running tests in headless mode (without a browser UI) for faster execution.

.
Check also
It enables interaction with elements of a web page, handling tasks from inputting text to asserting the visibility of a key element. Its robust API supports automation scenarios such as navigating browsers, managing cookies, and capturing dialog boxes.
Playwright tests can emulate complex user interactions with a web's structure, including selecting items from a list, clicking on labels, or handling CSS selectors.
Automate your tests for free
Test easier than ever with BugBug test recorder. Faster than coding. Free forever.
Sign up for free
Compared to tools like Cypress, Playwright offers cross-browser testing capabilities and the flexibility to write tests in multiple programming languages. Developers can write Playwright code to automate and interact with web elements, ensuring their applications work as intended in different environments. Tool also offers local parallel mode when tests are run (feature not available in Cypress).
Playwright integrates with Chrome DevTools Protocol to automate and control browser operations, providing a powerful interface for web automation and testing. This allows developers to programmatically interact with web pages, manipulate DOM elements, and monitor network requests, leveraging Chrome's extensive debugging capabilities.
💡 Check out also our other Cheat Sheets
In Playwright, a Browser represents an instance of a web browser. It's not just limited to a single tab or window; rather, it's the actual program itself, like an instance of Chrome or Firefox. When you start a browser through Playwright, you're effectively opening the application which can then contain multiple web pages and contexts.
A BrowserContext is an independent incarnation of a browser environment within Playwright. It can be thought of as an incognito session where no state is shared with other browser contexts.
This isolation is particularly useful for simulating multiple sessions or users in testing scenarios. Each context can have its own cookies, local storage, and session information, and you can have multiple contexts within the same browser instance.
A Page in Playwright is akin to a single tab or window in a web browser. It provides methods to interact with and control a single web page. Actions such as navigating to URLs, interacting with page content, and evaluating JavaScript within the context of the web page are done at this level. Pages live within a browser context, and you can have multiple pages within a single context.
Selectors are the means by which Playwright identifies elements on a web page to interact with. They can be CSS selectors, XPath selectors, text selectors, or even custom selectors defined by the user. Once a selector is defined, Playwright can perform actions on the element it points to, such as clicking, typing, or reading text. For every selector engine with syntax and examples, see our guide to Playwright selectors.
Elements, or more specifically ElementHandles, are objects that reference an element on a page. Once you have an ElementHandle, you can perform actions on that element, and it will ensure that the element is available and not stale.
💡 TIP
This is useful for interacting with elements that may not be immediately available due to dynamic content loading and other asynchronous behavior common in modern web applications.
The Playwright API is designed to be intuitive and straightforward. It mirrors the structure of a web browsing experience at a high level while providing detailed control at the lower levels. The API is organized around the following hierarchy:
Automate your tests for free
Test easier than ever with BugBug test recorder. Faster than coding. Free forever.
Sign up for free
| Task | Syntax |
|---|---|
| Create or add Playwright to a project | npm init playwright@latest |
| Update Playwright Test | npm install -D @playwright/test@latest |
| Install browsers and system dependencies | npx playwright install --with-deps |
| Check the installed version | npx playwright --version |
| Run all tests | npx playwright test |
| Run one test file | npx playwright test tests/example.spec.ts |
| Run a test at a specific line | npx playwright test tests/example.spec.ts:42 |
| Run tests matching a title | npx playwright test -g "checkout" |
| Run one browser project | npx playwright test --project=chromium |
| Run in headed mode | npx playwright test --headed |
| Open UI Mode | npx playwright test --ui |
| Open Playwright Inspector | npx playwright test --debug |
| Run with one worker | npx playwright test --workers=1 |
| Re-run failed tests | npx playwright test --last-failed |
| Generate a test | npx playwright codegen https://example.com |
| Open the HTML report | npx playwright show-report |
| Open a trace | npx playwright show-trace trace.zip |
| Locate a button | page.getByRole('button', { name: 'Submit' }) |
| Fill an input | await page.getByLabel('Email').fill('qa@example.com') |
| Click an element | await page.getByRole('button', { name: 'Submit' }).click() |
| Check a checkbox | await page.getByLabel('Accept terms').check() |
| Select an option | await page.getByLabel('Country').selectOption('PL') |
| Assert visibility | await expect(page.getByText('Success')).toBeVisible() |
| Assert the page URL | await expect(page).toHaveURL(/dashboard/) |
| Capture a screenshot | await page.screenshot({ path: 'page.png', fullPage: true }) |
Playwright 1.62 supports the latest Node.js 22.x, 24.x, and 26.x releases.
For a new project, run:
npm init playwright@latest
The installer lets you choose TypeScript or JavaScript, select the test directory, add a GitHub Actions workflow, and install the required browser binaries.
For an existing project, install or update Playwright Test and its browsers:
npm install -D @playwright/test@latest
npx playwright install --with-deps
Verify the installed version:
npx playwright --version
To install only one browser, add its name:
npx playwright install chromium
npx playwright install firefox
npx playwright install webkit
Create a file named tests/example.spec.ts:
import { test, expect } from '@playwright/test';

test('opens the example page', async ({ page }) => {
  await page.goto('https://example.com');

  await expect(page).toHaveTitle(/Example Domain/);
  await expect(page.getByRole('heading')).toBeVisible();

  await page.screenshot({ path: 'example.png' });
});
Run the test:
npx playwright test tests/example.spec.ts
Playwright Test provides an isolated browser context for every test and closes it automatically after execution.
const browser = await chromium.launch({ headless: false }); // for visible browser
const page = await browser.newPage();
await page.goto('https://example.com');
Playwright can interact with HTML Input elements such as text inputs, checkboxes, radio buttons, select options, mouse clicks, type characters, keys and shortcuts as well as upload files and focus elements
Text Inputs: Using the locator.fill() method is a highly efficient technique for populating form fields. This approach automatically focuses on the targeted element and initiates an input event that inputs the specified text. It is compatible with <input>, <textarea>, and [contenteditable] elements, making it a versatile tool for form automation.
await page.getByRole('textbox').fill('Example Text');
Checkboxes and Radio Buttons: Using locator.setChecked() is the easiest way to check and uncheck a checkbox or a radio button
await page.getByLabel('Agree to Terms').check();
await expect(page.getByLabel('Agree to Terms')).toBeChecked();
Select Options: The locator.selectOption() method is used to choose one or several options within a <select> element. It allows selection based on the option's value or label. This function supports the selection of multiple options simultaneously.
await page.getByLabel('Select Color').selectOption('blue');
Mouse Interactions: Perform clicks, double-clicks, right-clicks, and hovers using page.click() and page.hover().
Generic click
await page.getByRole('button').click();
Double click
await page.getByText('Item').dblclick();
Right click
await page.getByText('Item').click({ button: 'right' });
Shift + click
await page.getByText('Item').click({ modifiers: ['Shift'] });
Hover over element
await page.getByText('Item').hover();
Click the top left corner
await page.getByText('Item').click({
position: { x: 0, y: 0 }
});
Type Characters: Using await page.locator('#area').pressSequentially('Hello World!');, you can simulate the pressing of keys one after another. This function generates all required keyboard events, including 'keydown', 'keyup', and 'keypress' events.
Additionally, you have the option to set a delay between each key press, effectively mimicking real user typing behavior.
Press keys one by one
await page.locator('#area').pressSequentially('Hello World!');
Shortcuts: For special keyboard handling, use locator.pressSequentially() and locator.press().
await page.getByText('Submit').press('Enter');
Upload Files: Select files for upload with locator.setInputFiles().
await page.getByLabel('Upload File').setInputFiles('path/to/file.txt');
Focus and Drag-and-Drop: Focus elements with locator.focus() and perform drag-and-drop with locator.dragTo().
const source = page.getByText('Draggable Item');
const target = page.getByText('Drop Area');

await source.dragTo(target);
Automate your tests for free
Test easier than ever with BugBug test recorder. Faster than coding. Free forever.
Sign up for free
Use a frame locator and then locate the element inside the iframe:
await page
  .frameLocator('iframe[name="frame-name"]')
  .getByRole('button', { name: 'Submit' })
  .click();
await page
  .getByLabel('Upload File')
  .setInputFiles('path/to/file.txt');
Start waiting for the download before clicking the link:
const downloadPromise = page.waitForEvent('download');

await page.getByRole('link', { name: 'Download' }).click();

const download = await downloadPromise;
await download.saveAs(`downloads/${download.suggestedFilename()}`);
Offline mode belongs to BrowserContext, not Page:
await page.context().setOffline(true);
await page.context().setOffline(false);
| Locator type | Syntax |
|---|---|
| Role and accessible name | page.getByRole('button', { name: 'Submit' }) |
| Form label | page.getByLabel('Email') |
| Placeholder | page.getByPlaceholder('Search') |
| Visible text | page.getByText('Welcome') |
| Test ID | page.getByTestId('submit-button') |
| CSS | page.locator('button.primary') |
| XPath | page.locator('//button[@id="submit"]') |
Prefer user-facing locators such as getByRole(), getByLabel(), and getByText(). Use getByTestId() when the application provides an explicit testing contract. Avoid long CSS or XPath paths tied to the current DOM structure, and avoid positional selectors unless order is the behavior being tested.
await page.getByTestId('submit-button').click();
💡 Check also our Selectors Cheat Sheet.
await page.$('data-testid=submit-button'); // Custom attribute selector
Playwright Test includes its own expect assertion library. Web-first assertions automatically retry until the expected condition is met or the assertion timeout expires, so you normally do not need to wait for an element manually.
await expect(page).toHaveTitle('Expected Title');
await expect(page).toHaveURL(/dashboard/);
await expect(page.getByRole('heading')).toBeVisible();
await expect(page.getByTestId('status')).toHaveText('Complete');
await expect(page.getByLabel('Email')).toHaveValue('qa@example.com');
await expect(page.getByRole('listitem')).toHaveCount(3);
await asynchronous Playwright assertions.toBeVisible() and toHaveText().page.waitForTimeout().expect.poll() or expect().toPass() when a more complex condition must be retried.The following table covers the most useful test-authoring, execution, and debugging additions introduced between Playwright 1.55 and 1.62.
| Version | Addition | Example syntax |
|---|---|---|
| 1.55 | Full test-step title path | testStepInfo.titlePath() |
| 1.56 | Recent console messages, page errors, and requests | await page.consoleMessages() · await page.pageErrors() · await page.requests() |
| 1.57 | Global run tags | defineConfig({ tag: '@e2e' }) |
| 1.57 | Read a locator description | locator.description() |
| 1.57 | Wait for output from a development server | webServer: { command: 'npm start', wait: { stdout: /Ready/ } } |
| 1.58 | Local CDP connection optimization | chromium.connectOverCDP(endpoint, { isLocal: true }) |
| 1.59 | Record a controlled screencast | await page.screencast.start({ path: 'video.webm' }) |
| 1.59 | Capture a page ARIA snapshot | await page.ariaSnapshot() |
| 1.59 | Replace storage state in an existing context | await context.setStorageState(state) |
| 1.59 | Retrieve stored console messages or page errors with filters | await page.consoleMessages({ filter: 'error' }) |
| 1.59 | Create live traces | await context.tracing.start({ live: true }) |
| 1.60 | Record HAR through the tracing API | await using har = await context.tracing.startHar('trace.har') |
| 1.60 | Drop files or data onto an element | await page.locator('#dropzone').drop({ files }) |
| 1.60 | Abort the current test | test.abort('Unrecoverable test state') |
| 1.60 | Match a complete page ARIA snapshot | await expect(page).toMatchAriaSnapshot() |
| 1.60 | Match an accessible description in getByRole() |
page.getByRole('button', { description: 'Saves changes' }) |
| 1.61 | Test WebAuthn passkeys | await context.credentials.install() |
| 1.61 | Read or update web storage directly | await page.localStorage.setItem('token', 'abc') |
| 1.61 | Read API security and server information | await apiResponse.securityDetails() |
| 1.62 | Cancel actions and assertions with AbortSignal |
await locator.click({ signal: controller.signal }) |
| 1.62 | Save WebP screenshots | await page.screenshot({ path: 'page.webp' }) |
| 1.62 | Isolate retries at the end of a run | defineConfig({ retries: 2, retryStrategy: 'isolated' }) |
| 1.62 | Wait on a function scoped to an element | await locator.waitForFunction(element => element.dataset.ready) |
| 1.62 | Read API response timing | await apiResponse.timing() |
| 1.62 | Start the bundled Playwright CLI or MCP server | npx playwright cli · npx playwright mcp |
await page.getByLabel('Username').fill('user');
await page.getByLabel('Password').fill('pass');
await page.getByRole('button', { name: 'Log in' }).click();

await expect(page).toHaveURL(/dashboard/);
const data = await page.evaluate(() => {
// Return scraped data from page
return document.querySelector('.elementClass').textContent
});
E-Commerce Checkout Process Automation
Initialize Playwright: Set up the Playwright environment with the required browser (e.g., Chromium).
Test Data Preparation: Prepare test data, like product details and user credentials.
Start Browser: Launch the browser in headless or non-headless mode based on the requirement.
Open Website: Navigate to the e-commerce website's homepage.
Access Login Page: Click on the login link/button.
Enter Credentials: Fill in the username and password fields.
Submit Form: Click on the submit button.
Verify Login: Check if the user's account page is loaded.
Browse Products: Navigate to the product category.
Select a Product: Click on a product.
Add to Cart: Click the 'Add to Cart' button.
Verify Cart: Ensure that the product is added to the cart.
View Cart: Navigate to the shopping cart.
Check Product Details: Verify the selected product's details (name, quantity, price).
Proceed to Checkout: Click on the 'Proceed to Checkout' button.
Delivery Information: Fill in the delivery address and contact information.
Choose Delivery Option: Select a delivery method.
Payment Information: Enter payment details (credit card, PayPal, etc.).
Review Order: Confirm all details are correct.
Submit Order: Click the 'Place Order' button.
Verify Order Confirmation: Check for a successful order confirmation message or page.
Order Details: Optionally, capture order details like order number for further verification.
Logout: Click the logout button.
Close Browser: Close the browser session.
💡 Additional Considerations
Assertions: Throughout the test, include assertions to verify if each step is completed as expected (e.g., page titles, confirmation messages).
Error Handling: Implement error handling for scenarios like out-of-stock products or payment failures
Responsive Design Testing: Optionally, test the checkout process on different screen sizes.
Cross-Browser Testing: Run the test across different browsers supported by Playwright.
Clean Up: Ensure that the test cleans up any data it creates, like removing test orders from the system.
page.on('console', message => console.log(message.text())); to listen to page console events.DEBUG=pw:api before running the script to get Playwright's API call logs.getByRole(), getByLabel(), or getByTestId() and confirm that it uniquely identifies the element.await expect(locator).toBeVisible() instead of adding a fixed delay.npx playwright install --with-deps.Use traces, screenshots, videos, and the HTML report to investigate failures. Video must first be enabled in playwright.config.ts; page.video() only returns a video object when recording is active.
import { defineConfig } from '@playwright/test';

export default defineConfig({
  use: {
    trace: 'on-first-retry',
    screenshot: 'only-on-failure',
    video: 'retain-on-failure',
  },
});
Automate your tests for free
Test easier than ever with BugBug test recorder. Faster than coding. Free forever.
Sign up for free
Playwright Test is the recommended test runner for Playwright projects. It provides fixtures, isolation, parallel execution, retries, reporters, tracing, projects, and the built-in expect assertion library without requiring Jest or Mocha.
Tests are defined with test(), grouped with test.describe(), and prepared with hooks such as test.beforeEach() and test.afterEach():
import { test, expect } from '@playwright/test';

test.describe('account settings', () => {
  test.beforeEach(async ({ page }) => {
    await page.goto('/settings');
  });

  test('updates the profile', async ({ page }) => {
    await page.getByLabel('Display name').fill('QA User');
    await page.getByRole('button', { name: 'Save' }).click();
    await expect(page.getByText('Changes saved')).toBeVisible();
  });
});
beforeEach, afterEach), which is essential for setting up the conditions for each test and cleaning up afterward.Parallel Execution:
Parallel execution in Playwright refers to the ability to run multiple browser instances or tests simultaneously. This is crucial for speeding up the testing process, especially when dealing with a large suite of tests.
Playwright supports parallel execution. It can also integrate with Jest or Mocha testing frameworks.
💡 TIP
In Playwright, each test or browser instance runs in its own context, which ensures that tests do not interfere with each other, providing isolation and more reliable results.
Headless Mode:
Headless mode in Playwright allows you to run browsers without a graphical user interface. This is especially useful for automated testing, particularly in continuous integration (CI) environments where you may not need a display for running tests.
Running in headless mode often results in faster execution of tests because it doesn't need to render the UI elements on the screen.
💡 TIP
You can enable headless mode in Playwright by setting the headless option to true when launching a browser. For example, in Playwright for JavaScript, you would use browserType.launch({ headless: true });.
npm init playwright@latest to generate a current GitHub Actions workflow, or create a workflow that installs dependencies, runs npx playwright install --with-deps, executes npx playwright test, and uploads the HTML report.💡 Resources
Official documentation: Playwright Documentation
Community forums and support: Playwright GitHub Discussions
Happy (automated) testing!
A: The Playwright Cheat Sheet is a resource that provides a quick reference guide for leveraging Playwright for browser automation and testing.
A: To explore the features and capabilities of Playwright, you can refer to the official documentation and tutorials provided by the Playwright team.
A: Playwright offers features such as cross-browser testing, parallel and headless execution, and the ability to automate tasks across different web platforms.
A: It is recommended to set up Playwright for automation by following the installation and setup instructions provided in the official Playwright documentation.
A: Use built-in locators such as getByRole(), getByLabel(), getByText(), getByPlaceholder(), and getByTestId(). CSS and XPath locators are also available through page.locator(), but user-facing locators are usually more resilient.
A: Playwright supports mobile web testing through device, viewport, touch, locale, and browser emulation. It does not automate native Android or iOS applications.
A: Migrating to Playwright from frameworks like Cypress can offer benefits like local parallel testing. Playwright is also much easier when it comes to complexity of the code - and it also supports multiple languages.
A: You can ensure accessibility in automated tests using Playwright by leveraging features such as 'text alternative', 'accessible value await', 'label await', and 'placeholder'.
A: Yes, Playwright can be integrated with Git for version control to manage and track changes in automation scripts and test files.
A: To master Playwright for advanced automation tasks, it is recommended to explore advanced features, APIs, and best practices provided by the Playwright team and community.
A: In the Playwright framework, async ({page}) signifies a function that operates asynchronously, accepting an argument named page that denotes a web page. The use of async indicates that the function is designed to execute without hindering the concurrent running of other scripts.
Logging in Playwright refers to capturing and displaying information about the browser's activities during a test run. This can include network requests, API calls, console messages, errors, and other events that occur while Playwright scripts are executing. Logging is crucial for debugging and understanding the behavior of web applications during automated testing.
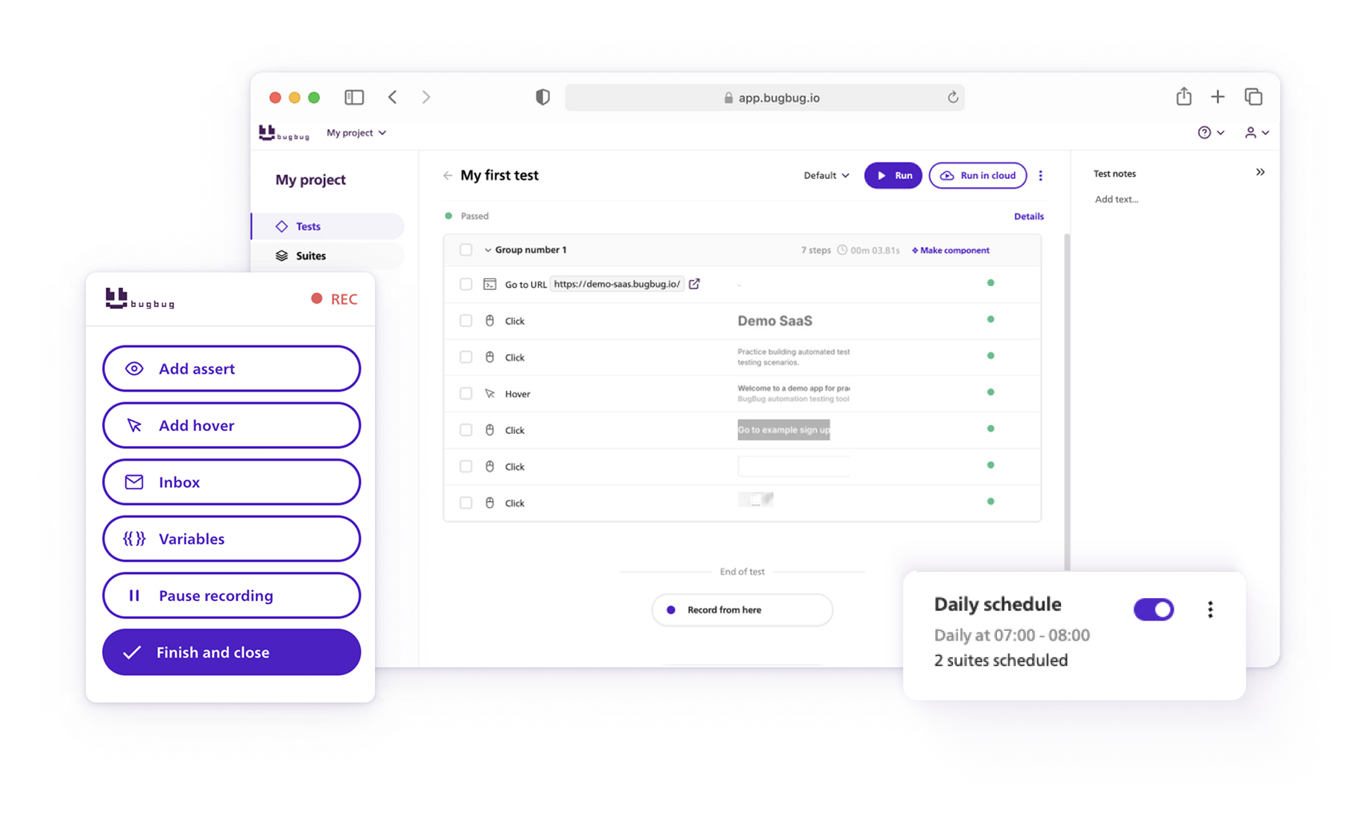
Your next release. Properly tested.
Join 1,200+ QA teams that automated their regression coverage with BugBug.

Dominik Szahidewicz is a Software Quality Evangelist specialising in quality assurance, test automation, and modern software testing practices. He creates practical, research-driven content that helps QA professionals, developers, and product teams improve test coverage, automate repetitive testing, and release more reliable web applications.
Drawing on his experience in technical writing, data analysis, and application consulting, Dominik translates complex testing concepts into clear, actionable guidance. His areas of interest include end-to-end testing, no-code test automation, regression testing, and the use of AI in software quality assurance.

Paweł Bylina is a software engineer, test automation product leader, and founder and CEO of BugBug, a no-code end-to-end testing platform used by teams in more than 50 countries. He has over 15 years of experience building software and leading engineering teams as a developer, engineering manager, CTO, and SaaS founder.
Paweł created BugBug after repeatedly seeing teams struggle with test automation that was costly to implement and difficult to maintain. He now works closely with QA engineers, developers, and engineering leaders to improve how software teams create and maintain reliable automated test coverage.
His expertise includes end-to-end testing, regression testing, browser automation, no-code test automation, QA strategy, and software quality. He shares practical insights drawn from building BugBug and working with software teams worldwide.
Join thousands of QA experts. Subscribe to our newsletter.
Get more testing tips and product related content. Zero spam.
We're presenting a useful Cypress Cheat Sheet full of commands, and selectors for you to test and use in the end-to-end testing framework.
Explore Selenium Webdriver locators, and commands with our Java Selenium Cheat Sheet.
Learn everything about XPath Selectors with this complete Selenium XPath cheat sheet — practical tips, examples, and shortcuts.
Learn Playwright locator with our guide: getByRole, getByText, getByTestId, and more. Check also our cheat sheet with more examples.
How does The Playwright Recorder compare to the modern, codeless approach of BugBug?
Playwright vs Selenium. Which wins for modern apps, when Selenium still beats it, and what to do if you can't code.
Learn how to use Playwright selectors for automation scripting. Selectors are strings used to perform actions on elements in a page.
Let's explore the best Playwright alternatives in 2026: Cypress, Puppeteer, Selenium, and more test automation tools and frameworks for developers.
Looking for the best Cypress alternatives in 2026? Explore leading competitors, features, and tools redefining automated software testing.