Train Your QA Team on BugBug: A 7-Day Onboarding Plan
Dominik SzahidewiczOctober 16, 2025
🤖 Summarize this article with AI:
💬 ChatGPT 🔍 Perplexity 💥 Claude 🐦 Grok 🔮 Google AI Mode
This guide lays out a day-by-day onboarding plan. Each day, you’ll focus on one concrete step — from creating your first test to integrating BugBug into CI/CD pipelines — so that by the end of the week, your team will not only be onboarded but already running useful automated tests.
Day 1 – Setup Made Simple: Create a free BugBug account, install Chrome extension, invite teammates, and explore the dashboard.
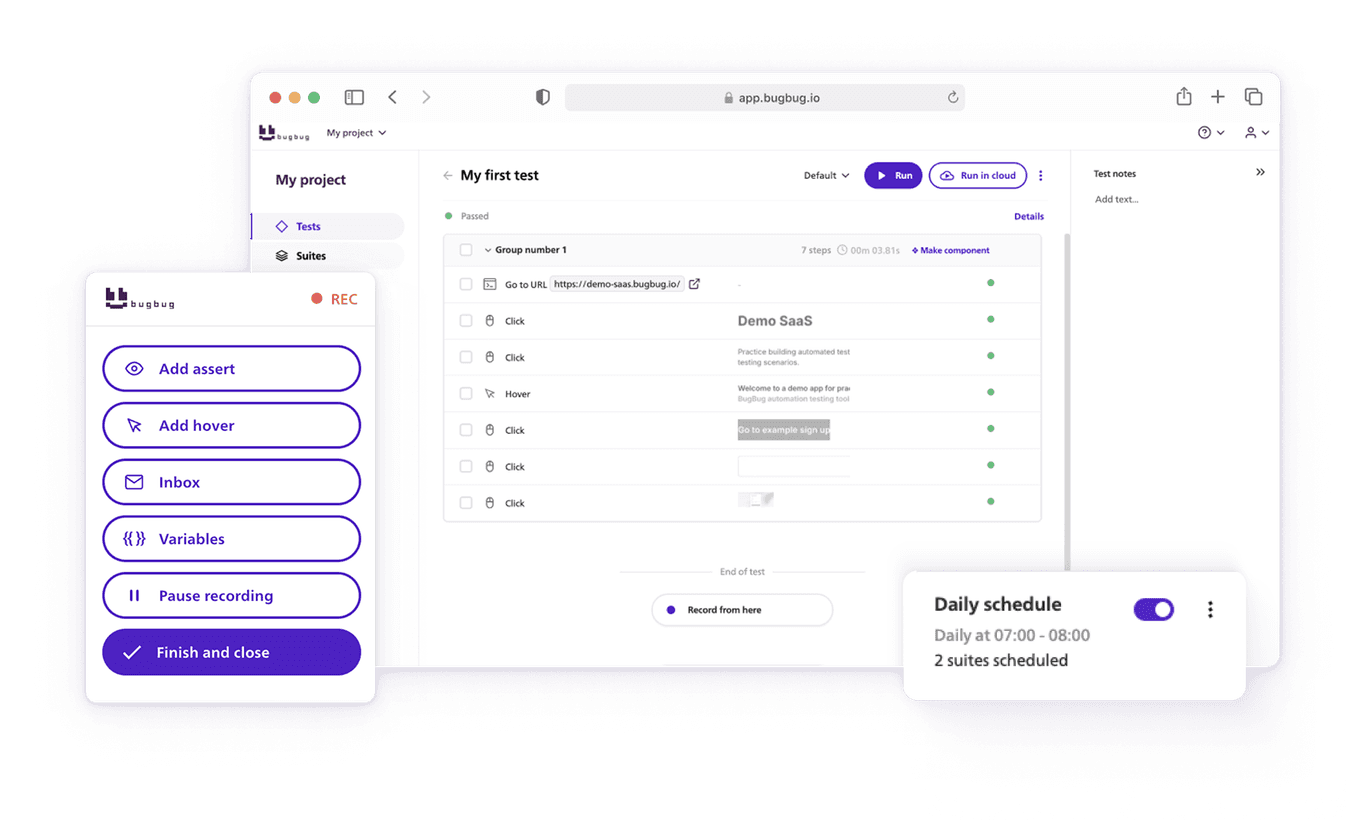
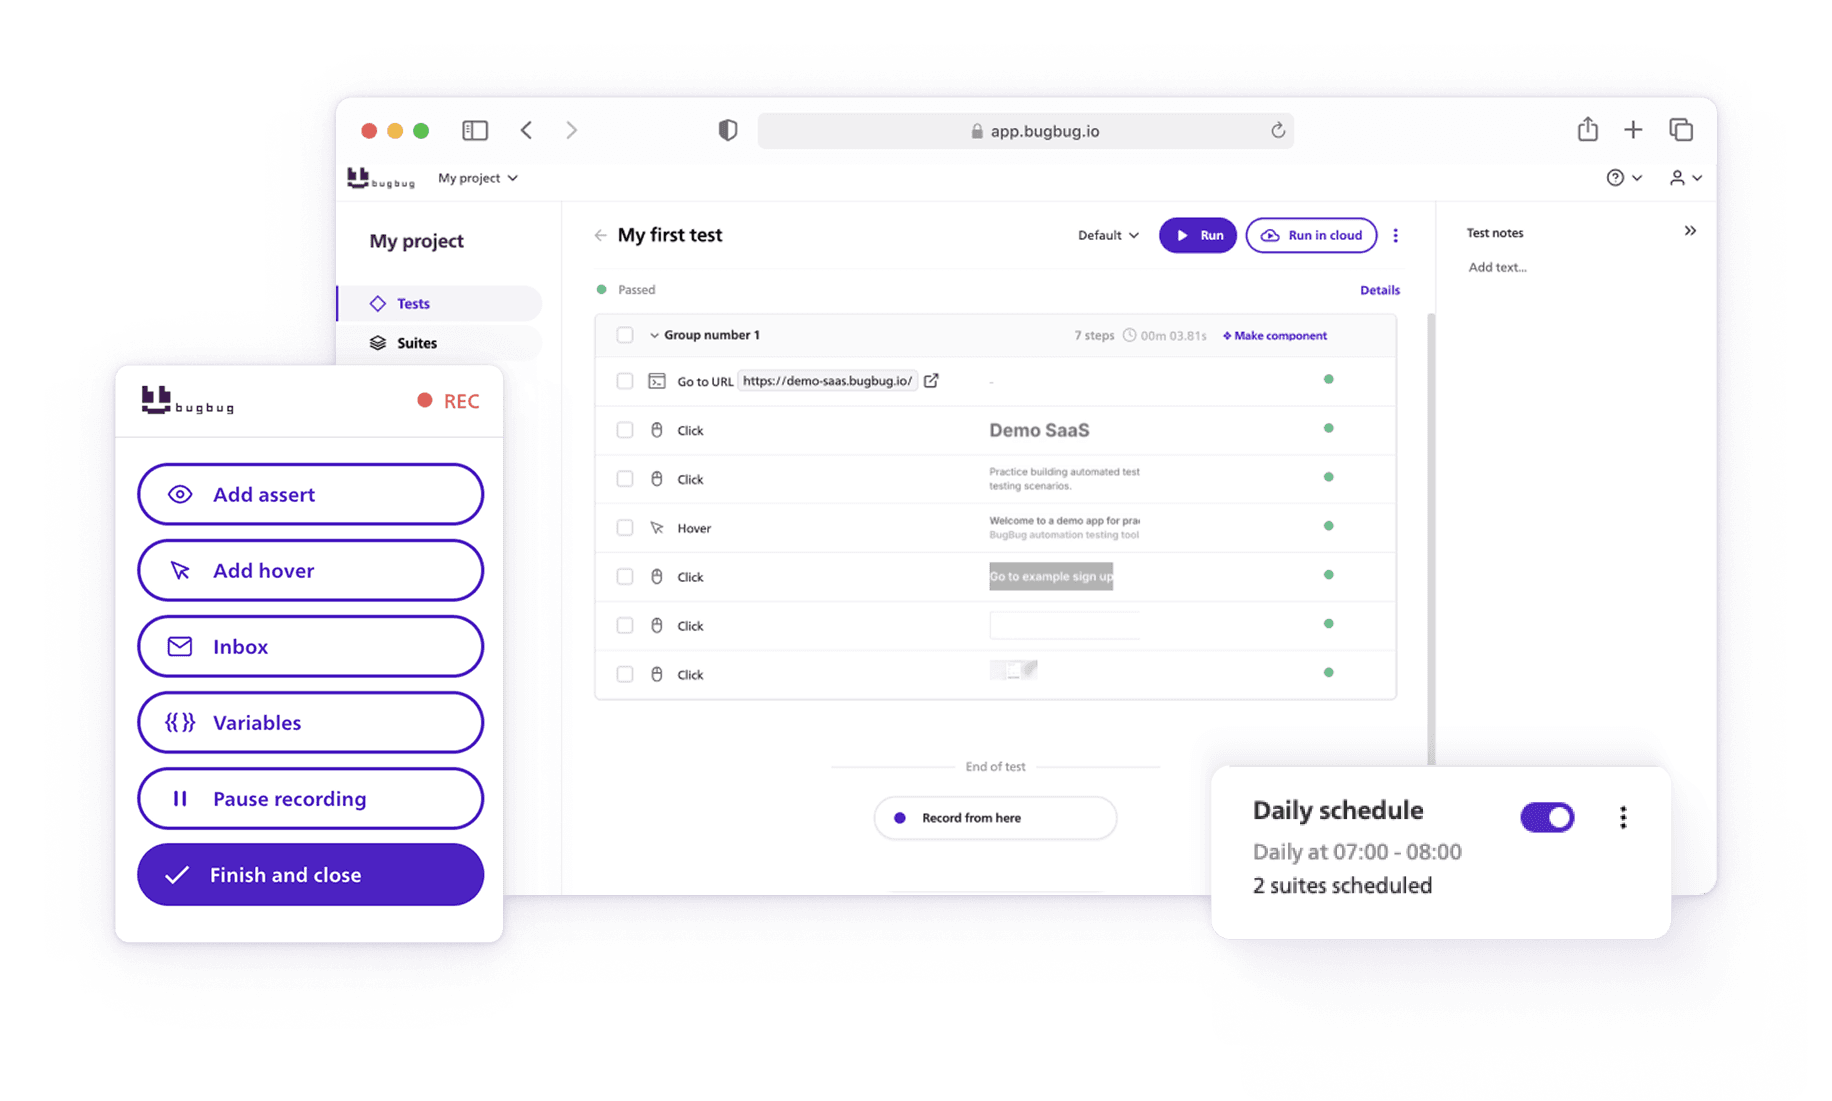
Day 2 – First Test in Minutes: Record a simple flow like login or signup, then debug with BugBug’s unique Edit & Rewind feature.
Day 3 – Stay Organized: Use projects, folders, and naming conventions to structure tests and assign clear team roles.
Day 4 – Make Tests Maintainable: Edit tests with grouping, reusable components, assertions, variables, and even custom JavaScript.
Day 5 – Automate Execution: Run tests manually or in suites, and schedule daily smoke or nightly regression runs in the cloud.
Day 6 – Integrate with CI/CD: Connect BugBug to GitHub Actions, GitLab, Jenkins, or any pipeline to enable true continuous testing.
Day 7 – Collaborate and Share: Use the application to build trust and embed automation into team culture.
Rolling out a new test automation tool is often harder than it looks. Most teams get stuck at the onboarding stage: installing dependencies, setting up environments, and teaching team members how to write scripts. By the time the first meaningful test is ready, enthusiasm has usually dropped — and so has trust in the tool.
BugBug is designed to solve this. It’s codeless, lightweight, and runs directly in the browser, so your team can start testing without spending days on configuration. Instead of weeks of setup, you can get the whole team comfortable with automation in just seven days.
👉 Also check: Essential Web Application Testing Tools
The first step in onboarding is simply getting everyone into the platform. Unlike traditional tools that require downloads, drivers, or complex configuration, BugBug is entirely browser-based. All you need is a free account to get started.
💡 Pro tip:
At this stage, don’t worry about creating perfect structures. The goal of Day 1 is simply to get everyone inside BugBug, clicking around, and seeing how lightweight the platform feels compared to traditional automation setups.
Now that your team is set up, it’s time to build momentum by creating your first automated test together. This step is crucial: the faster your team sees a working test, the quicker they’ll trust the tool and buy into automation.
With BugBug, recording a test requires no coding. The browser extension captures user actions (clicks, inputs, navigations) and turns them into repeatable steps. In less than 15 minutes, you can have your first test running.
Start with something essential and easy to reproduce:
💡 Tip: Focus on the happy path first — don’t overcomplicate with edge cases yet.
🚀 By the end of Day 2, your team has already gone from zero setup to a working automated flow.
By Day 3, your team has a working test. The next challenge is to keep things organized so tests don’t become a messy collection of recordings.
Think of a Project in BugBug as a container for a product, feature, or environment.
Example: one project for your web app, another for your admin panel.
Within each project, you can group tests by feature (login, checkout, search).
Inside a project, create test suites to reflect workflows or areas of responsibility.
Agree on a simple, consistent convention:
[Feature] – [Action] – [Outcome]
Login – Valid Credentials – SuccessCheckout – Invalid Card – Error MessageUse BugBug’s team collaboration features to set responsibilities:
✅ By the end of Day 3, your team has an organized system for scaling automation.
Recordings are a great start, but editing is what makes tests maintainable. BugBug offers powerful tools to keep automation resilient as your app evolves.
👉 Check how reusable components in BugBug save hours
With Edit & Rewind, rerun tests from any step instead of starting from the top.
Faster debugging = faster iteration.
✅ By the end of Day 4, your team is building robust, reusable test suites, not just throwaway recordings.
Automation pays off when tests run reliably without human effort. BugBug makes this straightforward.
Quick checks after editing or debugging.
Bundle related tests (e.g., smoke tests, checkout flow) and run them together.
💡 Pro tip: Start small with a daily smoke suite to catch major breakages early.
✅ By the end of Day 5, your automation is running on autopilot.
CI/CD integration brings testing closer to the code, preventing regressions from reaching production.
Automation thrives when results are visible and trusted by the whole team.
BugBug removes the friction that makes traditional automation tools so hard to adopt.
In just seven days, your team can move from zero automation to a sustainable, collaborative testing practice.
👉 Ready to start? Sign up for BugBug’s free plan and onboard your team this week.
Happy (automated) testing!
Speed up your entire testing process
Automate your web app testing 3x faster.

Dominik Szahidewicz is a technical writer with experience in data science and application consulting. He's skilled in using tools such as Figma, ServiceNow, ERP, Notepad++ and VM Oracle. His skills also include knowledge of English, French and SQL.
Outside of work, he is an active musician and pianist, playing in several bands of different genres, including jazz/hip-hop, neo-soul and organic dub.
Join thousands of QA experts. Subscribe to our newsletter.
Get more testing tips and product related content. Zero spam.
Discover the causes and impact of flaky tests, and learn effective strategies to identify and fix them for reliable software performance.
Learn how to create a test plan for the testing process of your web application. Discover how to write a test plan with examples in the article.
Learn how to build an effective QA strategy that aligns with your business goals. Discover best practices in quality assurance, test automation, and more!
Discover how to calculate ROI for test automation with easy formulas and practical examples. Learn to evaluate costs and track results effectively.
Discover practical strategies to engage developers and product managers in software testing. Learn how collaboration improves product quality.
Learn how to effectively handle NoSuchElementException in Selenium with Java. Discover examples, best practices, and insights.
How to Scale Test Automation Without Code? A comprehensive guide for Qa teams, saas and startups.
Learn how to speed up end-to-end (E2E) testing with smart test design, CI/CD optimizations, and lightweight tools like BugBug.
How to test a website? Read our whole article on how you should approach testing your website.


