🤖 Summarize this article with AI:
💬 ChatGPT 🔍 Perplexity 💥 Claude 🐦 Grok 🔮 Google AI Mode
- You already have tests — suites are what make them useful
- Test case vs test suite
- Creating test suites in BugBug
- How can you structure your test suites in BugBug?
- Suite options that actually matter
- Why suites become powerful only with schedules
- How scheduling works in BugBug
- Common scheduling setups
- Start simple: one suite, one schedule
If you’ve already created your first automated tests in BugBug, you’re past the hardest part.
The next step — and the one that unlocks real value — is using test suites and schedules.
This guide explains how to use suites effectively in BugBug, why they matter, and how schedules turn your tests into continuous quality monitoring instead of one-off runs.
You already have tests — suites are what make them useful
Running individual tests manually works only at the very beginning. As soon as you have more than a few tests, problems appear:
- you’re not sure which tests to run and when
- running everything takes too long
- test results don’t clearly answer “is the app OK?”
In BugBug, test suites solve this problem. Suites let you group tests with a clear purpose and run them together — in parallel, in the cloud, and on a schedule.
Think of suites as the bridge between having tests and using automation effectively.
Test case vs test suite
Understanding this distinction helps you design better automation.
- Test case
A single automated scenario that checks one behavior
(for example: user can log in successfully) - Test suite
A collection of test cases that answer a broader question
(for example: are core user flows working?)
Test cases validate functionality.
Test suites validate confidence.
In BugBug, suites are also the unit of execution and scheduling — you can’t schedule individual tests, only suites.
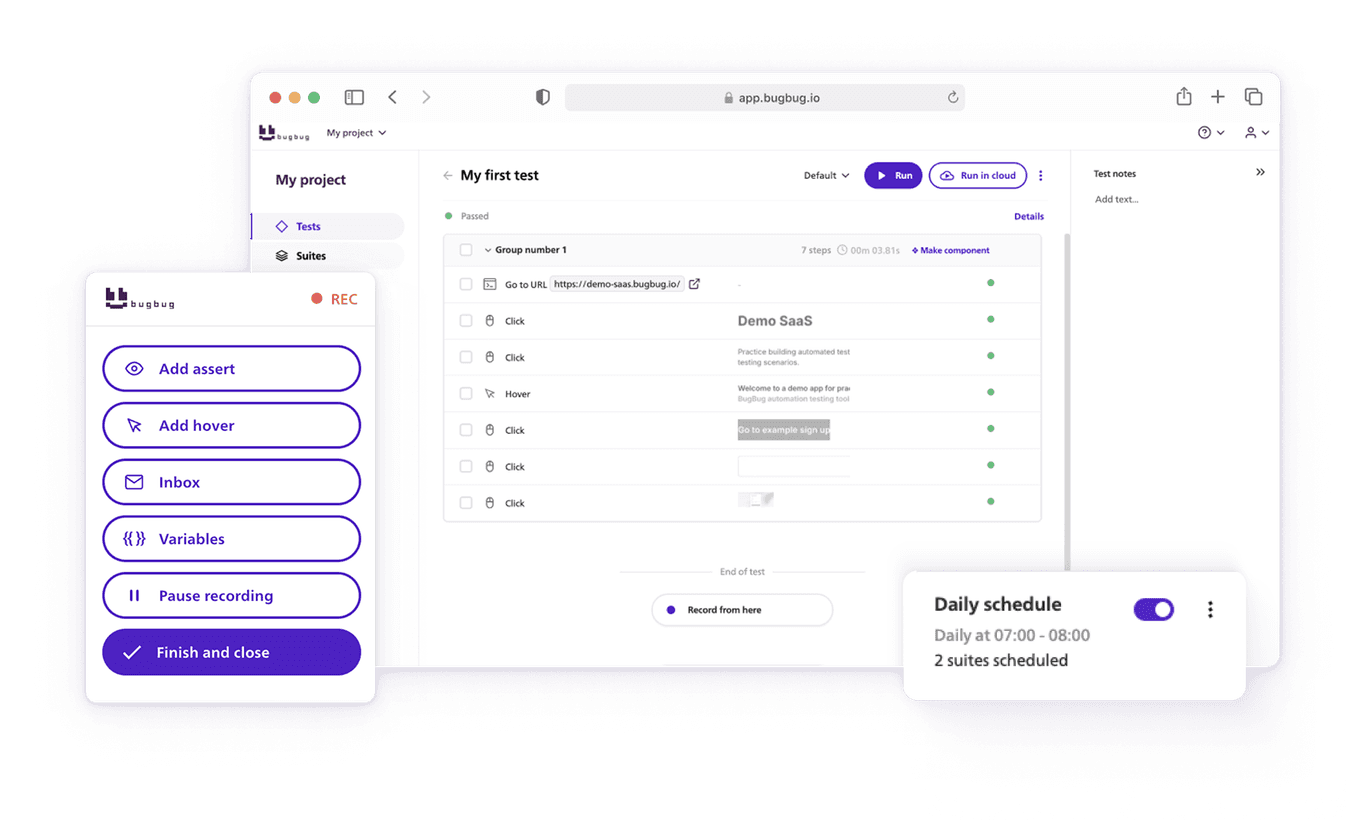
Creating test suites in BugBug
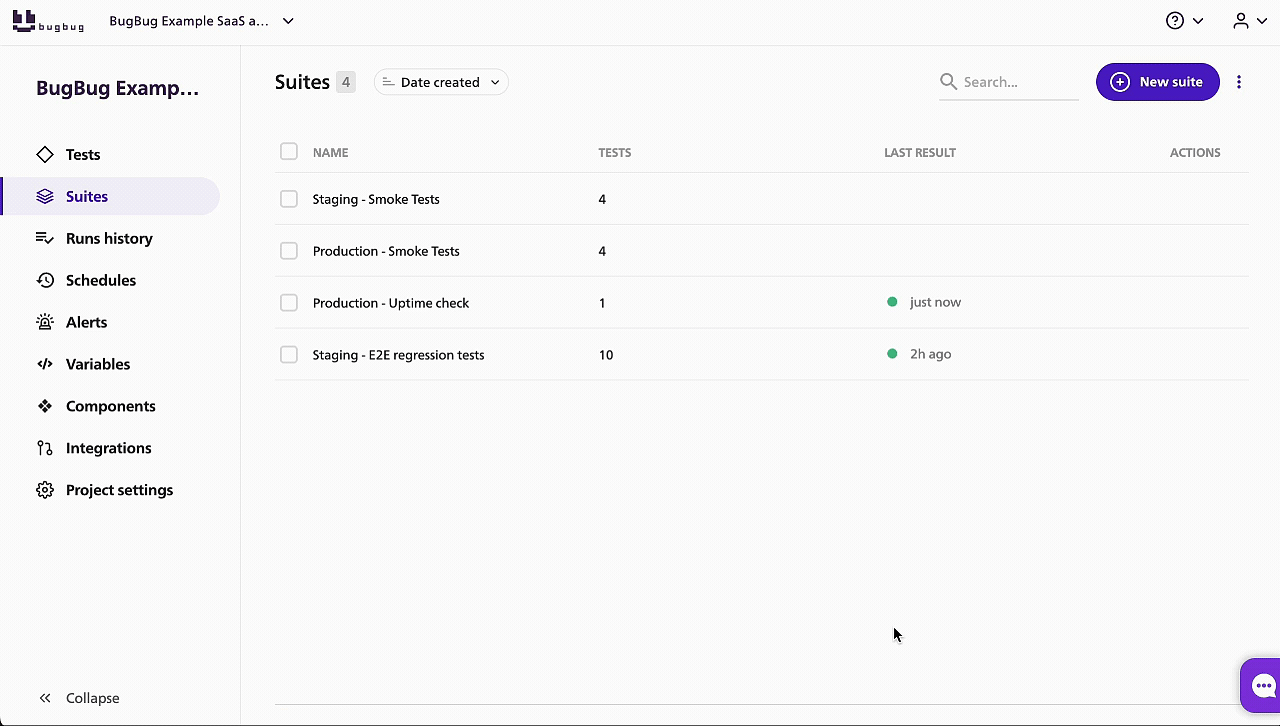
Creating a suite in BugBug is intentionally simple:
- Go to the Suites tab.
- Click Create new suite.
- Give the suite a clear, purpose-driven name.
- Select the tests you want to include.
- Choose suite options.
- Save.
A good rule: name suites by intent, not by feature list
(for example: “Core production flows”, not “Login + Cart + Checkout”).
Documentation: Suites | BugBug Documentation
How can you structure your test suites in BugBug?
You don’t need many suites. Most teams get value from just a few well-defined ones.
1. Core / production suite
This suite contains:
- stable tests
- critical user flows
- scenarios that must always work
It’s often scheduled to run frequently (for example, every hour) to monitor the app.
2. Regression suite
This suite includes:
- broader coverage
- edge cases
- less frequently used paths
It’s usually run manually before releases or major changes.
3. Work-in-progress suite
This suite is for:
- new or unstable tests
- feature-branch work
- tests not ready for production monitoring
After a release, tests from this suite are typically moved into the core or regression suite.
💡 TIP
You can also create multi-profile suites to run the same tests with different configurations, such as multiple languages or environments.
Suite options that actually matter
BugBug suites include a few options that directly improve reliability and speed.
Parallel execution
Suites run tests in parallel, which means:
- much faster execution
- quicker feedback
- better fit for frequent monitoring
Documentation: Parallel runs | BugBug Documentation
Profiles
Profiles allow the same suite to run with different configurations:
- languages
- environments
- user roles or data sets
This avoids duplicating tests while increasing coverage.
Documentation: Profiles | BugBug Documentation
Auto-retry for flaky tests
Some tests fail randomly due to factors like:
- temporary network issues
- busy servers
- short CPU overloads
These are called flaky tests.
With auto-retry enabled:
- a failed test is automatically retried
- if a retry passes, the suite is marked as passed
- failed attempts are still visible in run history
- only consistent failures trigger alerts
Auto-retry works only for cloud runs and is enabled by default to reduce false alarms.
Documentation: How to prevent flaky tests | BugBug Documentation
Why suites become powerful only with schedules
A suite that you run manually is still manual work.
Schedules are what turn suites into automation.
Schedules allow BugBug to:
- run your suites automatically in the cloud
- repeat runs at regular intervals
- notify you when something breaks
Without schedules, automation depends on memory and discipline.
With schedules, it becomes part of the system.
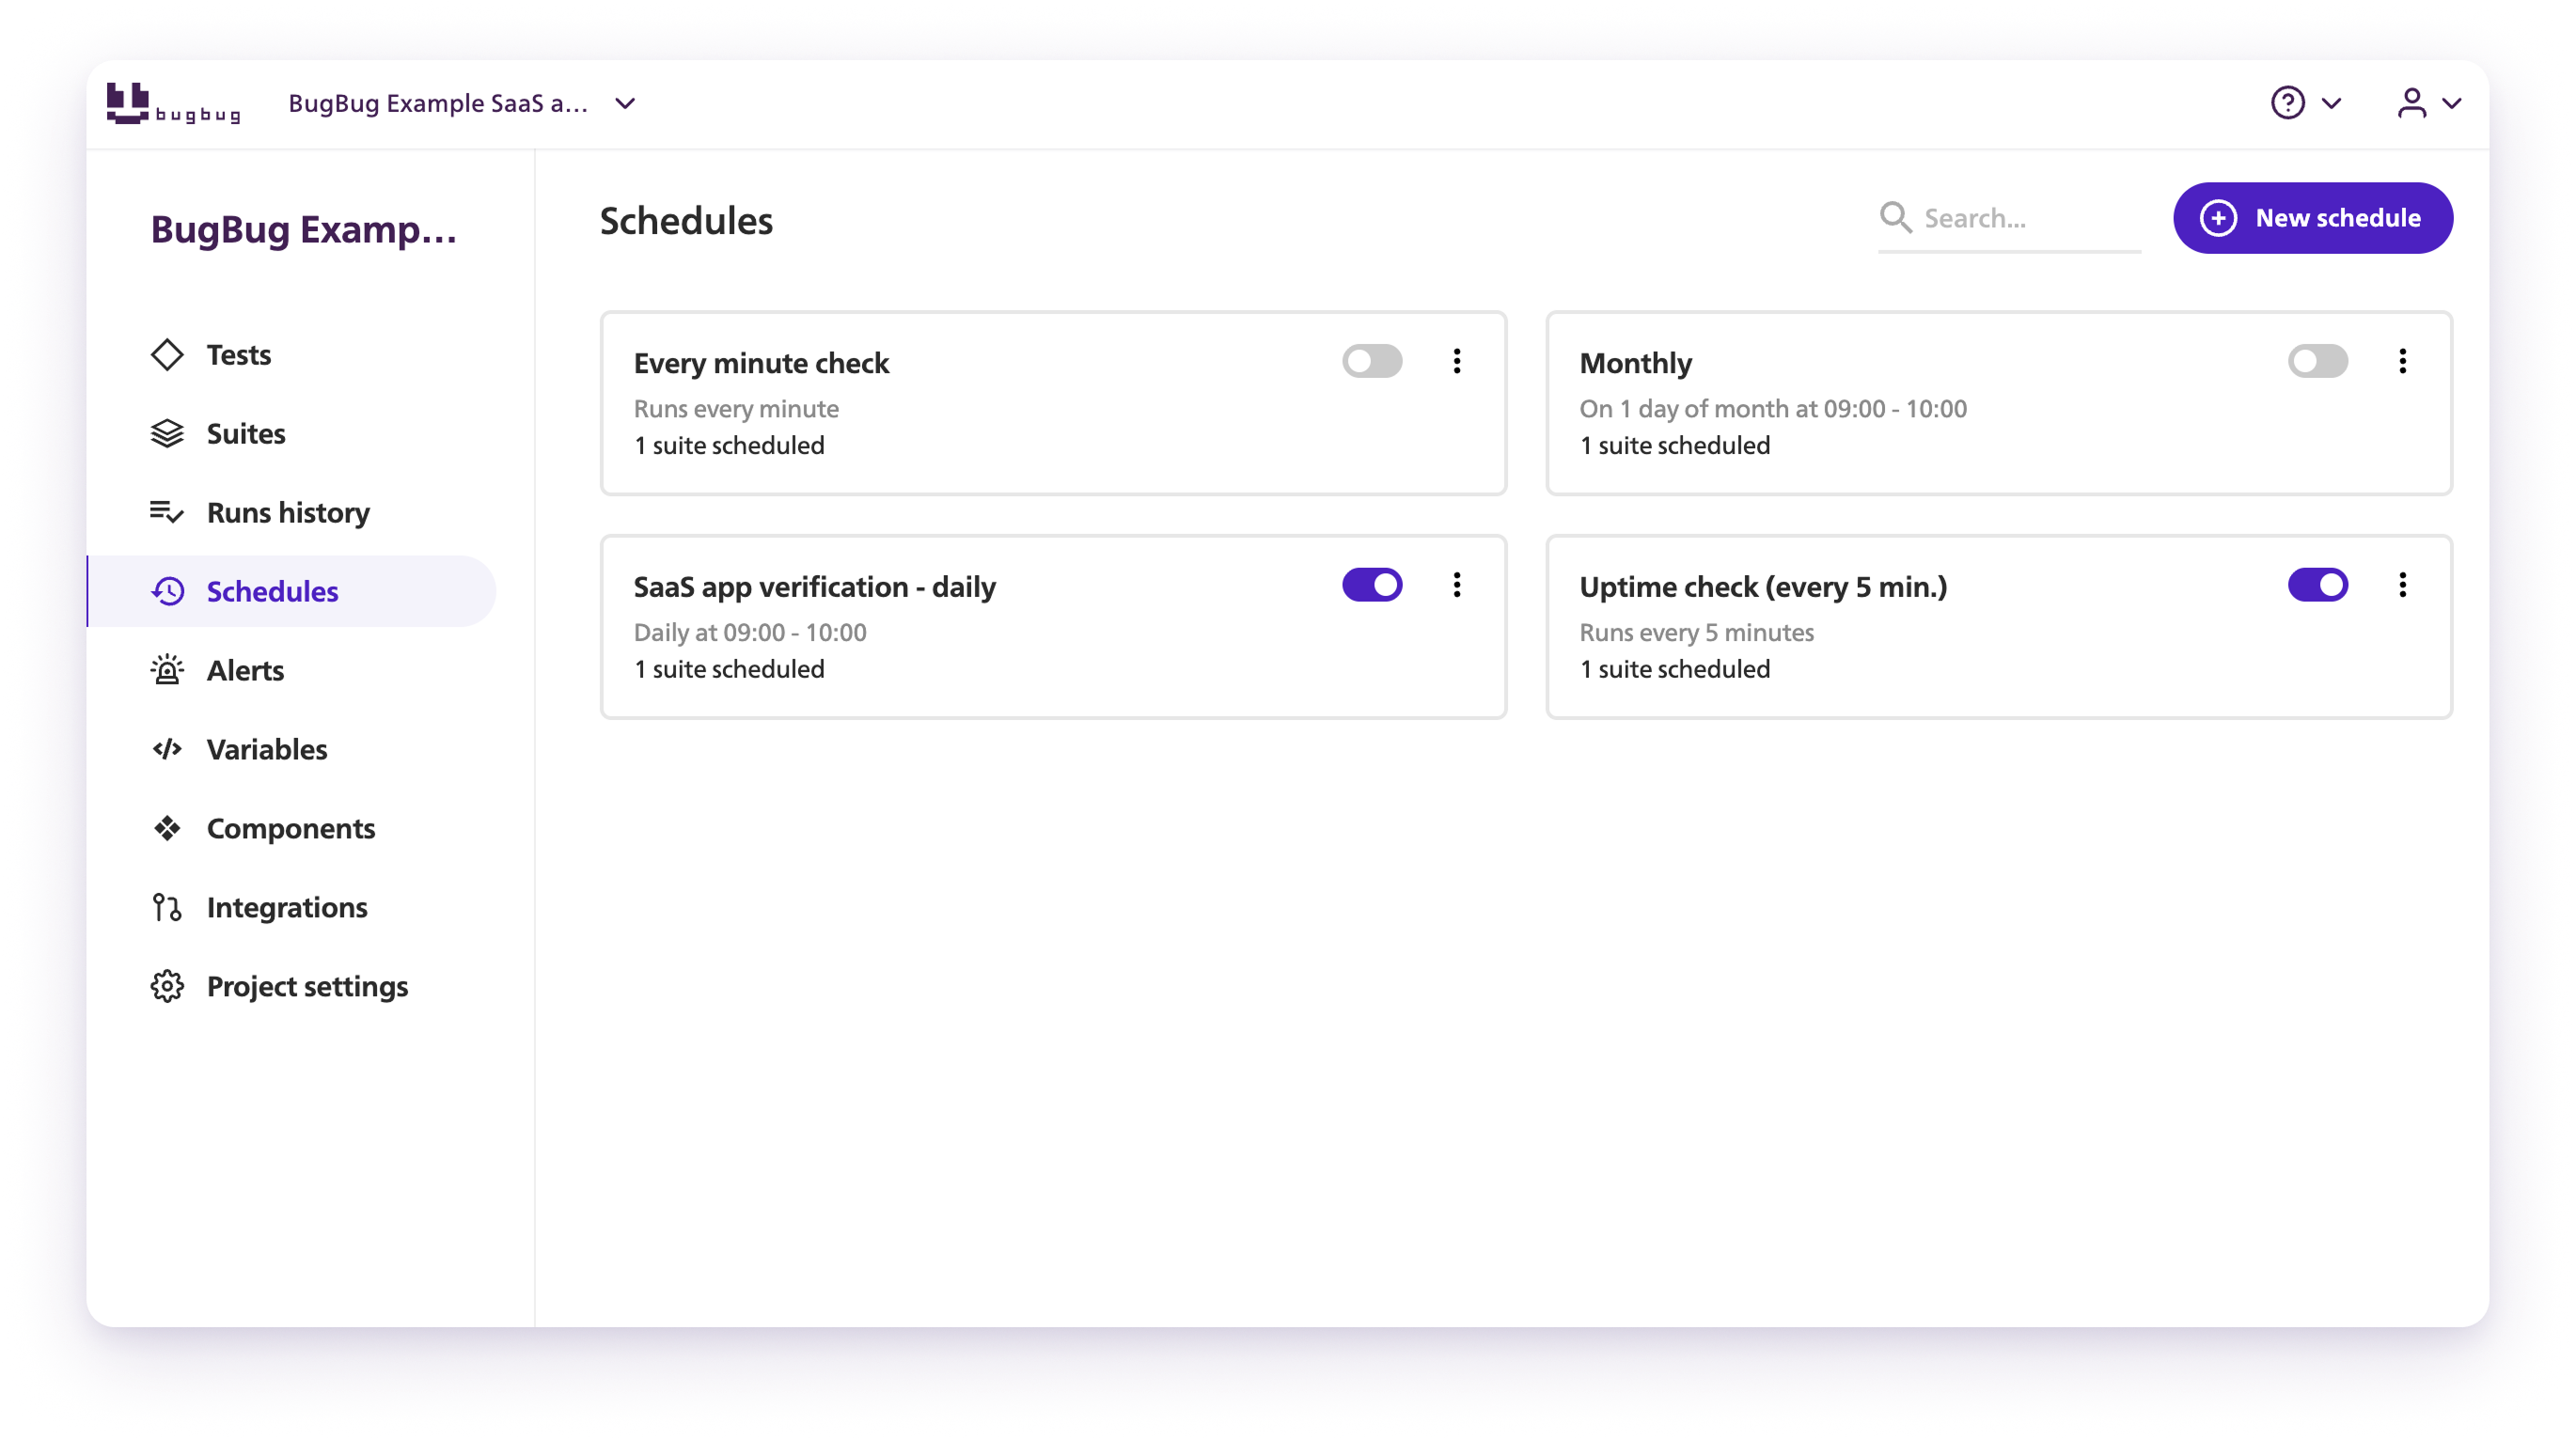
How scheduling works in BugBug
In BugBug, schedules:
- run test suites automatically
- work only with suites (not individual tests)
- support multiple frequencies: every minute, 5 minutes, 15 minutes, hourly, daily, weekly, monthly
- send email notifications with results
- can also notify your team in specific Slack channels
You can create multiple schedules for the same project — for example:
- frequent monitoring for production
- nightly runs for test environments
Auto-retry is enabled by default for scheduled suites to avoid false alerts from flaky tests.
Documentation: Schedules | BugBug Documentation
Common scheduling setups
Most teams use schedules like this:
- Production core suite → hourly
- Test or staging suite → nightly
- Regression suite → manual or pre-release
Separating suites by purpose makes schedules easier to manage and results easier to interpret.
Start simple: one suite, one schedule
You don’t need a complex setup to get value from BugBug.
A good starting point:
- Create one meaningful suite with critical tests.
- Make sure it passes in the cloud.
- Schedule it.
- Let BugBug run it for you.
From there, you can refine suites, add schedules, and expand coverage — but even this first step already turns tests into real automation.
Reports: turning test results into evidence and insights
Running suites regularly tells you whether your application works.
Reports explain what happened, why it happened, and how to prove it.
BugBug automatically generates reports for every suite run, so you can review results, share them with your team, or keep them as documentation of your QA process.
Why reports matter:
- they make failures easier to understand
- they provide evidence for releases and audits
- they allow teams to analyze trends and improve quality over time
Instead of manually collecting screenshots or writing summaries, BugBug records everything for you.
Standard vs Advanced Reports
BugBug provides two levels of reporting depending on your needs.
Standard reports are ideal for everyday work. They provide a clear overview of results and can be exported in formats such as:
- PDF for quick summaries
- JUnit XML for CI/CD pipelines and integrations
These reports are usually enough for day-to-day monitoring and team communication.
Documentation: Standard Reports | BugBug Documentation
Advanced Reports are designed for teams that need deeper visibility, traceability, or client-facing documentation (available on the Business plan).
They can include:
- detailed PDFs with step-by-step screenshots
- CSV files containing tests, steps, and selectors
- JSON exports for integrations and automation
- ZIP packages with screenshots and structured data for full traceability
This level of reporting is especially useful when results must be shared with stakeholders, auditors, or external clients.
Documentation: Advanced Reports | BugBug Documentation
Reports and scheduled suites work best together
Reports become most valuable when suites run automatically.
When a scheduled suite runs:
- results are recorded automatically
- reports are generated without manual work
- teams can review history and identify patterns
Over time, this creates a reliable record of application health and test performance.
For many teams, this history becomes as valuable as the tests themselves — it shows not only whether the app works today, but how stability evolves over weeks and releases.
Happy (automated) testing!